


Learn how to make your own exquisite Dubai-style chocolate bar at home. This guide offers simple, step-by-step instructions, using quality ingredients to achieve a luxurious, artisanal treat inspired by Dubai’s elegant culinary scene.
Dubai. A city synonymous with luxury, innovation, and a passion for the finer things. When we think of Dubai, we often imagine glittering skyscrapers, opulent souks, and world-class dining. But here, in my atelier, we also celebrate the artistry of chocolate, a craft that’s truly come alive in this vibrant metropolis. You might be curious about how to capture that unique Dubai flair in a chocolate bar, perhaps envisioning a treat as sophisticated and delightful as the city itself. It can seem complex, but crafting a beautiful, delicious chocolate bar is more accessible than you think. Join me, and we’ll embark on this sweet journey together, transforming simple ingredients into a masterpiece.
Contents
- 1 The Essence of a Dubai Chocolate Bar: More Than Just Ingredients
- 2 Essential Tools for Your Chocolate-Making Journey
- 3 Choosing Your Chocolate: The Foundation of Luxury
- 4 Ingredients for Your Dubai Chocolate Bar
- 5 Step-by-Step: Crafting Your Dubai Chocolate Bar
- 6 Visualizing Your Dubai Chocolate Bar: Design Inspiration
- 7 Advanced Techniques: Exploring Tempering
- 8 Troubleshooting Common Chocolate-Making Issues
- 9 Pairing Your Dubai Chocolate Bar
- 10 Frequently Asked Questions About Making Dubai Chocolate Bars
- 11 Conclusion: Your Sweet Creation Awaits
The Essence of a Dubai Chocolate Bar: More Than Just Ingredients
What truly defines a “Dubai chocolate bar”? It’s not just about using the finest cocoa beans, though that’s a crucial starting point. It’s about the experience, the presentation, and the subtle infusion of flavors that tell a story. Dubai’s culinary landscape is a magnificent tapestry woven from global influences and a deep appreciation for luxury. This translates into chocolate that is often rich, perhaps with exotic spices, nuts, or even hints of rose or oud, reflecting the aromatic souks. It’s about creating something that is not only delicious but also a feast for the eyes, a small piece of edible art.
Think of the warmth of the desert sun, the shimmer of gold, the intricate patterns of Arabic calligraphy – these elements can inspire the design and flavor profile of your chocolate bar. We’ll aim for a balance of familiar indulgence and a touch of the exotic, making your homemade creation feel truly special, a reflection of Dubai’s unique spirit.
Essential Tools for Your Chocolate-Making Journey


Before we begin crafting our Dubai-inspired chocolate bar, let’s gather the tools that will help us achieve a professional, artisanal finish. Having the right equipment makes the process smoother and the results more impressive.
- Double Boiler or Heatproof Bowl and Saucepan: Essential for gently melting chocolate without scorching it.
- Silicone Spatula: Perfect for stirring and scraping every last bit of melted chocolate.
- Chocolate Molds: Choose bar molds, or even decorative ones that echo traditional Islamic geometric patterns for an authentic touch. Silicone molds are highly recommended for easy demolding.
- Thermometer (Candy or Digital): Crucial for tempering chocolate accurately, ensuring a glossy finish and satisfying snap.
- Bench Scraper or Offset Spatula: For smoothing the chocolate in the mold.
- Small Bowls: For holding melted chocolate and any inclusions.
- Piping Bag (Optional): For decorative drizzles or intricate designs.
- Gloves (Optional): To avoid fingerprints on the finished chocolate.
Choosing Your Chocolate: The Foundation of Luxury
The quality of your chocolate is paramount. For a Dubai-style bar, we’re looking for rich, complex flavors. Think about:
- Couverture Chocolate: This is professional-grade chocolate with a higher percentage of cocoa butter, leading to a smoother melt and glossier finish. Look for percentages like 60-70% for dark chocolate, or high-quality milk and white chocolate.
- Single-Origin Chocolate: Beans from a specific region can offer unique flavor notes that add depth and character.
- Flavored Couverture: You can find couverture infused with spices like cardamom or even subtle floral notes.
For our beginner-friendly guide, we’ll focus on using good quality couverture chocolate. You can purchase this online or from specialty baking stores. For a Dubai touch, consider starting with a high-quality dark chocolate, perhaps from South America or Africa, known for their fruity or earthy undertones.
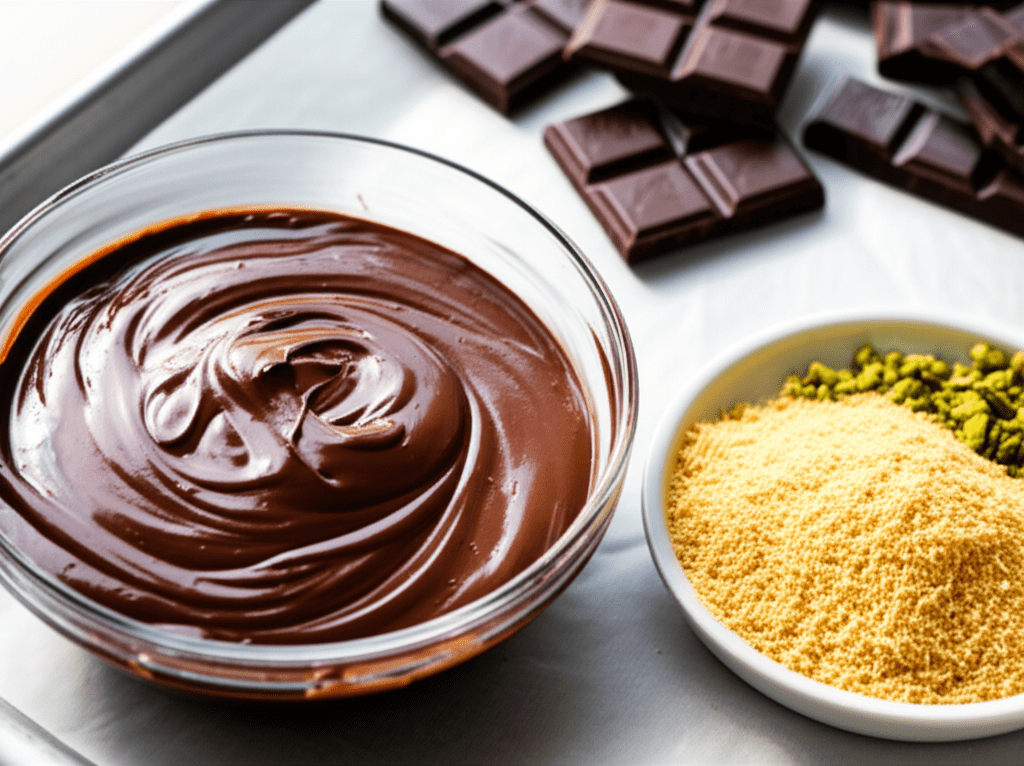
Ingredients for Your Dubai Chocolate Bar


Beyond the chocolate itself, the additions can elevate your bar to something truly extraordinary. Here are some ideas, blending classic luxury with Emirati influences:
- High-Quality Couverture Chocolate: 300-400 grams (dark, milk, or white, or a combination).
- Inclusions (Choose 2-3):
- Toasted Nuts: Pistachios, almonds, or hazelnuts add crunch and a nutty depth.
- Dried Fruits: Dates (a quintessential Emirati fruit!), figs, or cranberries offer chewy sweetness.
- Spices: A pinch of cardamom, cinnamon, or a tiny whisper of chili for warmth.
- Crispy Elements: Puffed rice or crispy feuilletine for texture.
- Edible Gold Leaf or Dust: For that unmistakable Dubai opulence.
- Freeze-Dried Berries: Raspberries or strawberries for a burst of color and tartness.
- Flavor Extracts (Optional): A few drops of rosewater or orange blossom water can add an aromatic sophistication.
The key is moderation. We want the chocolate to be the star, with the inclusions enhancing, not overpowering, its flavor.
Step-by-Step: Crafting Your Dubai Chocolate Bar
Let’s dive into the process. We’ll break it down into manageable steps to ensure a beautiful and delicious result. This method focuses on melting and molding, which is a great starting point for beginners. Tempering is an advanced technique, but for now, we’ll achieve a good result without it, focusing on careful melting and cooling.
Step 1: Prepare Your Workspace and Ingredients
A clean, cool environment is essential for chocolate making. Ensure your kitchen counter is clean and free of moisture. Have all your tools laid out and your chosen inclusions prepped – nuts toasted and roughly chopped, dried fruits chopped, spices measured.
- Chop any larger inclusions into bite-sized pieces.
- If using nuts, toasting them enhances their flavor. Spread them on a baking sheet and toast in a preheated oven at 160°C (320°F) for 5-8 minutes until fragrant, then let them cool completely.
- Have your chocolate molds clean and dry.
Step 2: Gently Melt Your Chocolate
This is where the double boiler comes in. Fill the bottom pan with about an inch of water and bring it to a simmer over low heat. Place the heatproof bowl on top, ensuring the bottom of the bowl doesn’t touch the water.
- Break your couverture chocolate into small, uniform pieces and place them in the heatproof bowl.
- Stir the chocolate occasionally with your silicone spatula. The gentle heat will slowly melt the chocolate.
- Be patient! Avoid overheating. If the chocolate looks like it’s getting too hot, remove the bowl from the heat for a moment.
- Melt the chocolate until it’s smooth and glossy. For dark chocolate, aim for a temperature around 45-50°C (113-122°F). For milk or white chocolate, around 40-45°C (104-113°F).
Pro Tip: Never let water come into contact with melted chocolate, as it can cause it to seize and become lumpy.
Step 3: Incorporate Flavors (Optional)
Once your chocolate is fully melted and smooth, you can gently stir in any liquid flavorings like rosewater or orange blossom water. Use sparingly – a little goes a long way!
- Add 1-2 drops of your chosen extract and stir gently until just combined.
Step 4: Fill Your Molds
Now, the exciting part! Carefully pour or spoon the melted chocolate into your bar molds. Fill them about two-thirds full to start.
- Pour the melted chocolate into the molds.
- Gently tap the mold on your counter a few times. This helps to release any air bubbles trapped in the chocolate and ensures an even layer.
- Use your bench scraper or offset spatula to scrape off any excess chocolate, creating a smooth, flat surface.
Step 5: Add Your Inclusions
This is where you personalize your Dubai chocolate bar. Sprinkle your chosen inclusions over the melted chocolate in the mold.
- Distribute your toasted nuts, dried fruits, or crispy elements evenly over the chocolate.
- If you’re using edible gold leaf, carefully apply small pieces to the surface. You can use tweezers or a dry brush for precision.
- Don’t overfill! You want the inclusions to be embedded, not piled high.
Step 6: Seal the Bar (Optional, for a layered look)
If you want to fully encase your inclusions, you can add a second layer of melted chocolate.
- Gently pour a thin layer of melted chocolate over the inclusions, enough to cover them completely.
- Tap the mold again to ensure the top layer is smooth and even.
Step 7: Cooling and Setting
This is a patient step. The chocolate needs to set completely to achieve a firm texture and a beautiful sheen.
- Place the filled molds on a flat surface in a cool, dry place. A refrigerator is ideal for beginners to ensure quick setting, but avoid the freezer as it can cause condensation.
- Let the bars set for at least 1-2 hours, or until they are completely firm and no longer tacky.
Step 8: Demolding Your Masterpiece
Once the chocolate is fully set, it’s time for the reveal!
- Gently flex the silicone mold to loosen the edges of the chocolate bar.
- Carefully pop the bars out of the mold. If using polycarbonate molds, you might need to tap them gently.
- Handle with care to avoid fingerprints. You can use gloves or place them on a clean surface immediately.
Congratulations! You have now crafted your very own Dubai-inspired chocolate bar.
Visualizing Your Dubai Chocolate Bar: Design Inspiration

The aesthetic of a Dubai chocolate bar is as important as its taste. Think about the city’s visual language:
- Geometric Patterns: Inspired by Islamic art, intricate patterns can be achieved with careful drizzling of contrasting chocolate or by using molds with these designs.
- Edible Gold and Silver: A signature of luxury, these add a touch of glamour that is quintessentially Dubai.
- Contrasting Colors: Pairing dark chocolate with vibrant dried fruits like cranberries or pistachios creates an appealing visual.
- Textural Variety: The mix of smooth chocolate, crunchy nuts, and chewy dates provides visual interest as well as a delightful mouthfeel.
Consider creating a “mosaic” effect by strategically placing chopped nuts and fruits on top, or a “marbled” effect by swirling two types of melted chocolate together before filling the mold. The possibilities are as vast as the Dubai skyline.
Advanced Techniques: Exploring Tempering
For those who wish to elevate their chocolate-making further, learning to temper chocolate is the next logical step. Tempering is a process of heating and cooling chocolate to specific temperatures, which stabilizes the cocoa butter crystals. Properly tempered chocolate:
- Has a beautiful, glossy sheen.
- Breaks with a satisfying “snap.”
- Melts smoothly in the mouth.
- Is resistant to bloom (the white, chalky streaks that appear on untempered chocolate).
There are several methods for tempering, including the seeding method and the tabling method. For a comprehensive understanding of chocolate tempering, I recommend consulting resources from organizations like Chocolate Today, which provides in-depth guides on this crucial technique.
Troubleshooting Common Chocolate-Making Issues
Even with the best intentions, hiccups can occur. Here are some common problems and their solutions:
| Problem | Cause | Solution |
|---|---|---|
| Chocolate is seizing (becomes thick and lumpy) | Contact with water or overheating | Try to save it by adding a small amount of hot, neutral oil (like grapeseed) or melted cocoa butter, stirring until smooth. If too far gone, it’s best to start over. |
| Chocolate has white streaks (bloom) | Improper tempering or temperature fluctuations during setting | For untempered chocolate, this is common. If you were trying to temper, your temperatures were likely off. The chocolate is still safe to eat but lacks the desired finish. |
| Chocolate won’t set | Room is too warm, or chocolate wasn’t cooled properly | Ensure your setting environment is cool and dry. Refrigeration can help speed up the process. |
| Air bubbles in the finished bar | Molds not tapped sufficiently | Tap the molds firmly on the counter after filling to release air bubbles. You can also use a toothpick to gently pop any visible bubbles. |
Pairing Your Dubai Chocolate Bar
A fine chocolate deserves a fine pairing. Consider these suggestions to complement the rich flavors of your Dubai-inspired creation:
- Arabic Coffee (Gahwa): The fragrant, cardamom-infused coffee is a classic pairing that enhances the spice notes.
- Date Syrup: A drizzle of rich date syrup can complement the sweetness and add another layer of Emirati flavor.
- Herbal Teas: Mint tea or chamomile can offer a refreshing contrast to the richness of the chocolate.
- Dessert Wine: A rich port or a sweet sherry can be a decadent accompaniment for a truly luxurious experience.
Frequently Asked Questions About Making Dubai Chocolate Bars
Q1: Do I need special ingredients to make a Dubai chocolate bar?
You don’t need “special” ingredients that are impossible to find. The key is using high-quality couverture chocolate and thoughtful additions like dates, pistachios, or spices like cardamom, which are readily available in specialty stores or online. The “Dubai” aspect comes from the inspiration and the luxurious presentation.
Q2: What is the difference between regular chocolate and couverture chocolate?
Couverture chocolate contains a higher percentage of cocoa butter than regular chocolate. This extra cocoa butter gives it a smoother texture, a glossier finish, and a better “snap” when broken. It’s the professional’s choice for molding and enrobing.
Q3: Can I use chocolate chips instead of couverture?
While you can melt chocolate chips, they are not ideal for creating smooth, glossy chocolate bars. They often contain stabilizers that prevent them from melting as smoothly and can result in a duller finish. For the best results, it’s worth investing in couverture.
Q4: How do I store my homemade chocolate bars?
Store your chocolate bars in a cool, dry place (ideally between 18-20°C or 64-68°F) away from direct sunlight and strong odors. An airtight container is best. Avoid the refrigerator if possible, as it can cause condensation, leading to bloom.
Q5: Is tempering chocolate necessary for a beginner?
For your very first attempt, it’s not strictly necessary. Carefully melting chocolate using a double boiler and allowing it to set in a cool environment will yield a decent bar. However, learning to temper will significantly improve the shine, snap, and shelf-life of your chocolate, making it truly artisanal.
Q6: How can I make my chocolate bar look more luxurious like those from Dubai?
Incorporate edible gold leaf or dust for a touch of opulence. Use decorative molds that reflect intricate patterns. Consider contrasting colors from ingredients like pistachios or freeze-dried raspberries. A smooth, even finish is also key.
Conclusion: Your Sweet Creation Awaits
Crafting a Dubai chocolate bar at home is a rewarding experience that allows you to infuse your own creativity and passion into a luxurious treat. From selecting the finest couverture to adding those special touches that evoke the elegance of Dubai, each step is a part of the artistry. Remember, the most important ingredient is your enjoyment of the process. Whether you’re sharing these bars with loved ones or savoring them yourself, you’ve created something truly special – a delightful fusion of global luxury and personal craft. May your chocolate journey be as rich and satisfying as the bars you create!